I woke up on Friday morning with a spot of such epic proportions that I was actually lost for words when I looked in the mirror (usually an expletive of some description springs from my lips in these situations). I took photos of it (for documentation purposes only, obviously), but I’m not ready to unleash them on you…however everyone who was in contact with me over the weekend will vouch that is was/is chronic. As I write this on Sunday night, it shows no signs of abating, so good coverage is my only option. I’m going to take you through my step-by-step tried and tested routine for covering even the fiercest of spots.
Step 1: DON’T PICK
Just don’t. Unless it’s really unavoidable, try to resist the urge to pick, prod or squeeze your face. Easier said than done, I know, but you’ll only end up aggravating your skin even more – rather opt for drying the sucker out instead (unless it’s a really deep cystic spot, in which case, don’t bother – nothing is going to help save for a dermatologist and a cortisone injection).
Also, it’s far easier to cover a smooth red bump than a crusty, flaky one.
Step 2: Foundation
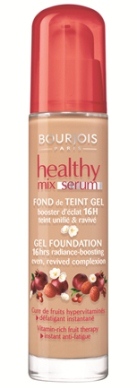
Some people find that colour correctors help to eliminate redness, but I haven’t found that they work for my skin tone. So I just go right in there with my foundation as per usual – I find my Bourjois Healthy Mix Serum Gel Foundation does the best job. I pat the foundation over the inflamed area using my foundation brush or my fingers.
Step 3: Concealer
As I’ve mentioned before, my go-to concealer is Laura Mercier Secret Camouflage Concealer. Sadly I have now run out, so I have had to make do with MAC Studio Finish Concealer (which is still excellent, by the way, I’m just being a fussy cow). I apply this using a lip brush, not a concealer brush – I find that lip brushes are better as they are more pointed and are therefore better at targeted, pinpoint concealing. I warm the concealer on the back of my hand and then gently press the concealer over the spot and blend it out lightly so the edges feather out and disappear. Then, and this is usually a sign of how severe the spot is, I apply a little Bourjois Healthy Mix Correcting Concealer on top of the MAC concealer, using the same method, for extra coverage.
Step 4: Powder
The last step is to set the concealer with a good powder. I have been using my Laura Mercier Pressed Setting Powder, but I can also highly recommend MAC Prep+Prime Translucent Finishing Powder or Black Opal Invisible Oil Blocking Pressed Powder. I like to use a powder brush to press the powder on top of the concealer, or alternatively, take the powder between my fingers and pat it on top. Do not attempt to blend, dust or buff the power in – it will undo all the good work you have just done.
And that, as they say, is that! I’ve found that if I apply the products in this sequence, they eliminate the redness completely and keep my blemishes covered all day.
So tell me, how do you cover your blemishes? Do you have any handy tips or tricks to share?


